Silver Mirror Toning: Making the Fault the Picture
Part 1 of 4 in the Silver Mirror Toning series | Next: Part 2 →
Sometimes when glancing at old silver gelatin prints that have been on display for decades, you may have seen it: a bluish metallic sheen sitting on the darkest areas, visible only at a glancing angle, towards the light. Conservators call it silver mirroring, and they treat it as damage. It is the slow migration of silver out of the emulsion and onto its surface, driven by residual thiosulfate, oxidising pollutants, and decades of patience. Whole careers are built on preventing it.
The workshop I took at Mörk in April, during the Helsinki Analog Festival, was about causing it on purpose, in a couple of minutes.
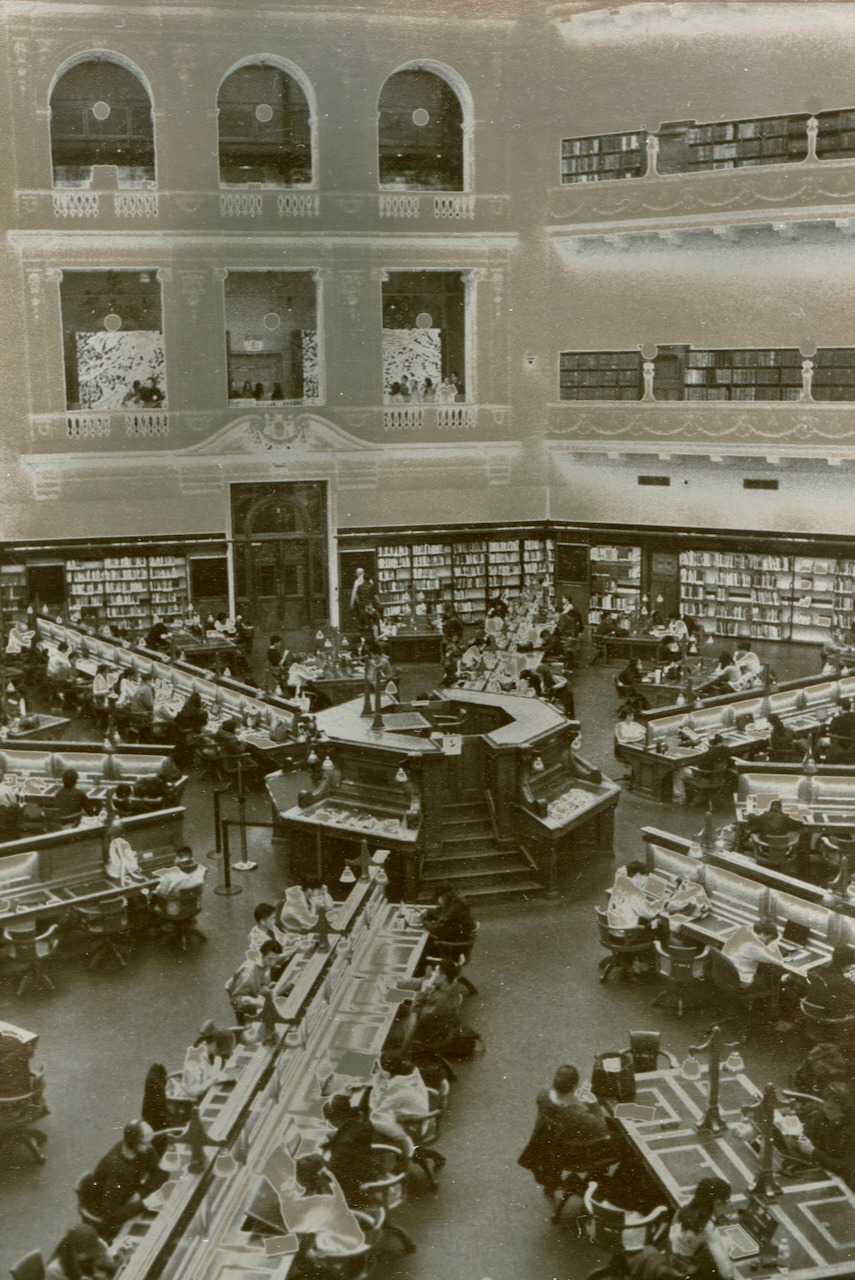
The workshop was led by Lexy Liangzi Xiao, an artist based in Bergen who has spent several years developing silver mirroring into a controllable printing process rather than an accident of ageing. Her framing stuck with me immediately: the technique takes a form of photographic degradation and makes it intentional. That is a description that would fit half of what I do in the darkroom — mordançage is emulsion failure made deliberate, lith is development running away from you on purpose. In silver mirroring, the print acquires a metallic surface that behaves like a mirror, and the picture changes depending on where you stand, with the colours depending on the exact mixture of toner you use.
This is the first of four posts. Here I cover what the process is, the chemistry I used, and the directions it can run. The second goes into the science of why any of it works — how silver ends up on top of the emulsion instead of inside it. The third documents what happened when I took Lexy's recipe and tried it on my usual papers, and combined with some of my other favourite processes. The fourth is a picture-led post about a series made with it in Singapore.
Where This Sits
Silver mirror toning is a close relative of the chromoskedasic Sabattier process I wrote about in 014–016. The physics specific to mirroring is in the next post; for the scattering and plasmon story underneath both processes, 015 remains the reference. The short version: both processes work by depositing metallic silver as particles rather than as the fine, light-absorbing grain of a normal print. Chromoskedasic printing aims for particles in the size range where they scatter selectively and you perceive colour. Silver mirroring aims for a dense, more or less continuous deposit at the emulsion surface, where the dominant effect is specular reflection instead. Similar activator chemistry, similar non-equilibrium behaviour, but at different extremes — indeed, taking chromoskedasic Sabattier too far can lead into silver mirror toning.
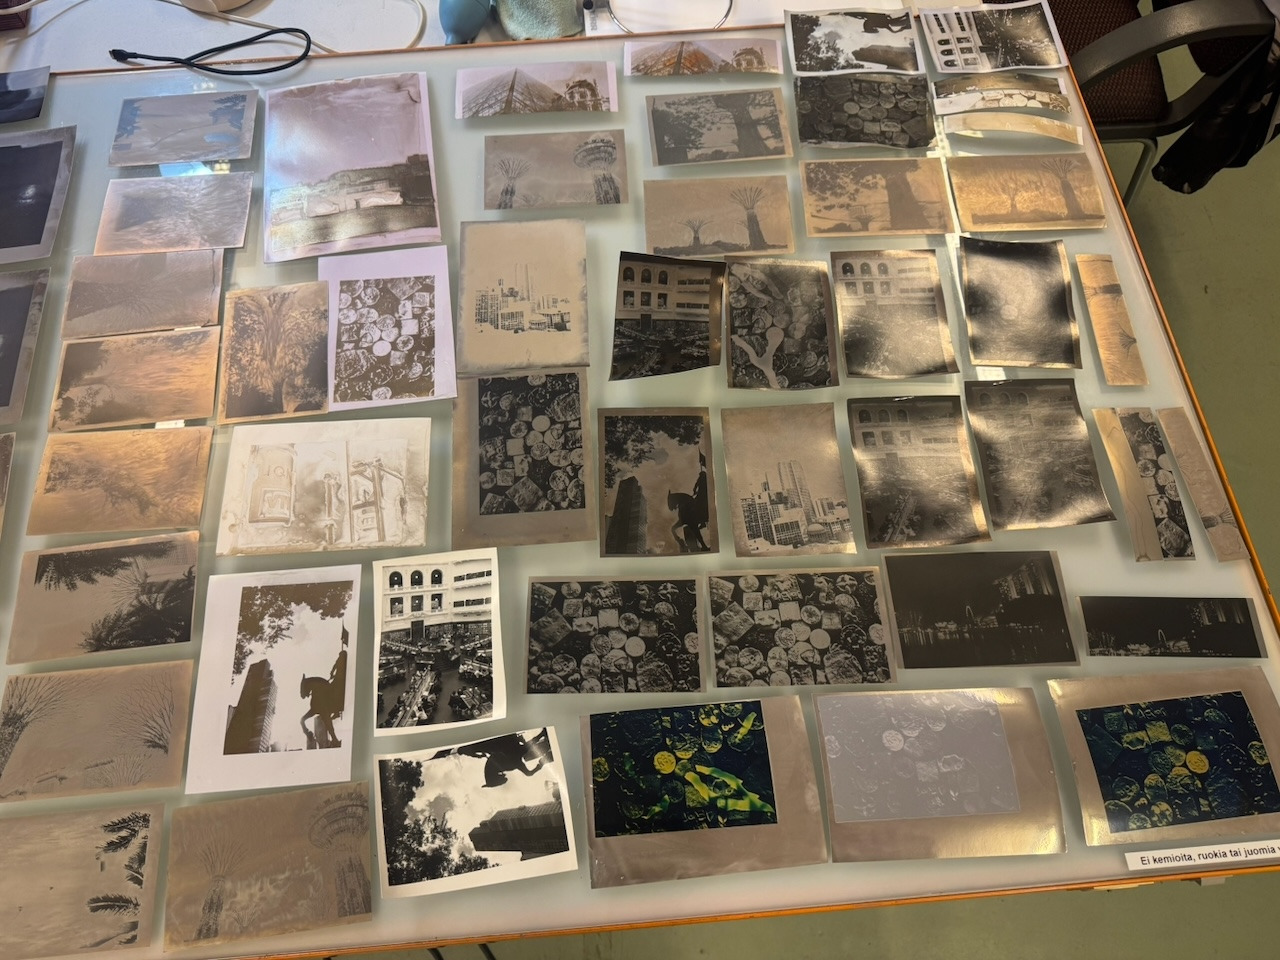
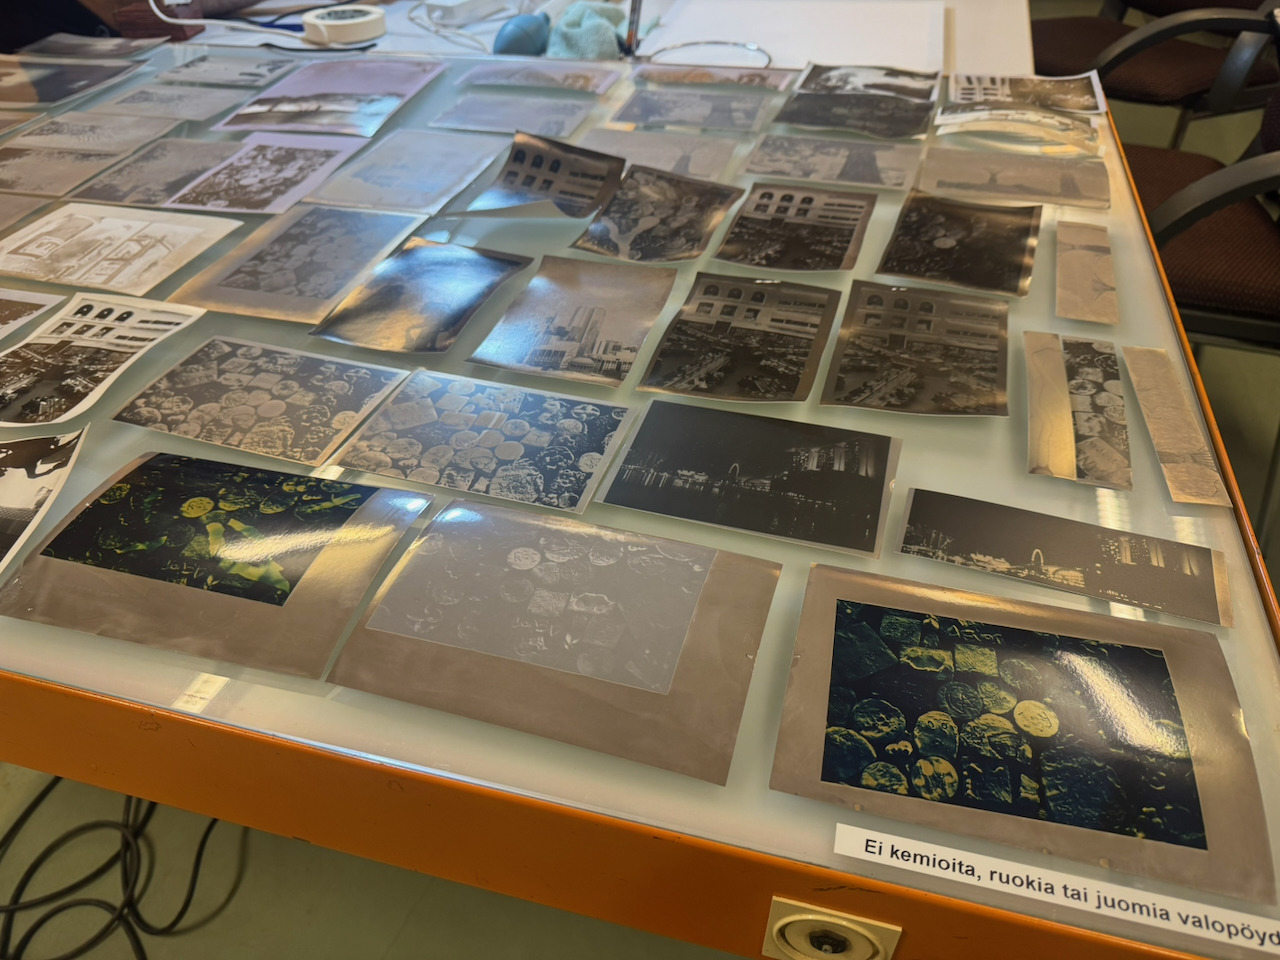
The other thing worth saying up front: this is a process that photographs badly. A flatbed scan of a mirrored print records almost nothing, because the scanner illuminates the print from a fixed angle and the whole point is angular dependence.
The two photographs below make the point better than the paragraph does. Same table, same prints, same afternoon — the only difference is where I was standing.
Direct and Indirect
The process runs in two directions, and the difference between them is simply which silver you feed it.
Direct toning happens before the fixer. At that point the highlights of a conventionally developed print are not empty — they are full of undeveloped silver halide that a normal workflow is about to dissolve and collect in your spent fixer. The toning bath instead complexes that halide and reduces it back out of solution as coarse silver at the surface. The result: mirrored highlights, black shadows. You are toning the highlights with the material you would normally remove.
Indirect toning happens after the print is finished, and starts by undoing it. A copper chloride bleach converts the developed metallic silver of the shadows back into silver halide, at which point the toning bath has something to work on in exactly the places direct toning could not reach. The result inverts: mirrored shadows, untouched highlights.
Both are worth having, and they suit different pictures. Direct toning puts the shine where the light is, which reads as glare, sky, water, chrome — it flatters images that already have specular highlights in them. Indirect toning puts the shine into the mass of the image, and gives the shadows colour and specularity. Indirect also would appear to be the best way to go when combining with other experimental processes, from my experience.
The Mix
Lexy's approach is well described in a write-up on AlternativePhotography.com, but here is the version I've been using for my test prints.
Toning bath, mixed 1:1:1 immediately before use:
- Sodium thiocyanate (NaSCN), 5.6% — the silver halide solvent. This is what gets silver into solution so it can be redeposited somewhere other than where it started.
- Sodium hydroxide (NaOH), 5% — the activator. Strongly alkaline, and the reason the reduction happens fast and coarsely rather than slowly and finely.
- Print developer at normal working strength — the reducing agent. I used some slightly old neutol eco.
Bleach (indirect only): copper chloride, 0.7%. This is the same rehalogenating bleach I use for mordançage, but at a much gentler concentration; it is converting silver back to halide, not attacking gelatin.
Temperature. I ran the toning bath at around 35 °C, on a heating mat under the tray. Heat is not optional here — this is a kinetically controlled process in the same way chromoskedasic work is, and a cold bath gives you a slow, thin version of the effect rather than a different one. I have not yet worked systematically down the temperature range to find where it stops being worth doing.
Sequences:
| Step | Direct | Indirect |
|---|---|---|
| 1 | Develop | Bleach (CuCl 0.7%) |
| 2 | Tone | Rinse |
| 3 | Rinse | Tone |
| 4 | Fix | Rinse |
| 5 | Rinse | Stabilise |
| 6 | Stabilise |
Note that indirect never returns to the fixer — the print was fixed the first time around, and the bleach/tone cycle is working on silver that is already committed to the paper.
A word on handling, since this is not a benign mix. Sodium hydroxide at 5% is caustic and will damage eyes on contact; thiocyanate can liberate hydrogen cyanide in an acidic mix. Gloves, goggles, ventilation, and separate tongs. I would avoid an acid stop bath into this sequence.
As the bath aged, the results became less uniform — patchier, less even, with more incident in them. And those are the prints I want more of. A tired bath has less silver-mobilising capacity and less reducing power, so it lays down a thinner, more broken deposit; if the coverage argument in the next post is right, that is a print sitting near the threshold where mirroring becomes patchy rather than continuous, with different parts of the same sheet falling on different sides of it. For some “interesting” results, one can deliberately work a bath through its life and print the whole decline.
Where the Waste Goes
I spent thirteen posts arguing that the environmental question in analogue photography is dissolved silver rather than developer choice, so I can hardly write up a process whose entire purpose is dissolving silver and moving it around, and leave that out.
A used toning bath contains silver in solution, thiocyanate, and sodium hydroxide. The indirect sequence adds a copper chloride bleach on top. None of that goes down a drain. It is the same disposal category as the chromoskedasic chemistry I covered in 025 — collect it, label it, and take it to hazardous waste collection, including the small volumes, because thiocyanate is an aquatic toxin and the silver is worse.
Two things make this less bad than it might be. The bath is a thiocyanate solvent at 5.6% rather than the 15–20% ammonium thiocyanate of a chromoskedasic stabiliser, so the burden per litre is substantially lower. And the volumes are small: a tray of working solution does a session, not a month.
The silver accounting is more interesting, and it runs the opposite way to what you might expect from a process this alarming-sounding. In conventional printing the silver you lose is the undeveloped halide in the highlights, which the fixer dissolves and carries out of the print — that is the bulk of what makes darkroom waste a problem in the first place. Direct toning gets there first. It intercepts that halide before the fixer and reduces it back down onto the sheet as image silver, so by the time the print is fixed there is markedly less left to dissolve. Indirect does the same thing from the other end: the bleach rehalogenates silver that is already in the print, the bath puts it straight back, and the sequence never returns to a fixer at all.
In other words, the silver mostly stays on the paper. That is the whole mechanism — it is what “printing with the material you would normally throw away” means when you follow it through to the drain. On silver alone, this process is plausibly better than straight printing rather than worse.
What it does add is a different hazard set: thiocyanate, sodium hydroxide, and copper chloride in the indirect route, none of which a conventional print run produces. That is a real cost and the reason the waste gets collected. But it is a different argument from the silver one, and worth keeping separate — which is the point the sustainability series keeps arriving at anyway.
Dry Them Slowly
One hard-won piece of practical advice: hang the prints vertically and leave them overnight.
Most of mine dried that way and came out clean. For a few I got impatient and used a print dryer with cold air, and every one of those developed drying marks — streaks and tidelines sitting in the mirrored areas, visible precisely at the angle where the mirroring is visible, which is to say exactly where you do not want them. Asking around afterwards, this seems to be a known hazard of the process rather than anything I did unusually wrong; the surface deposit is fresh, loosely held, and evidently sensitive to how the water leaves it. Similarly, finger marks can accrue.
There is something appropriate about a process that mimics a century of slow chemical migration insisting that you also wait for it.
Next: 035 · Why the Silver Comes to the Surface — physical development, nucleation, and the point where scattered particles become a mirror.