Lith Printing II: Control Through Contradiction
Part 2 of 3 in the Lith Printing series | ← Previous: Part 1 | Next: Part 3 →
Most of what I do in a lith session comes down to standing over a tray with a safelight torch held at a low angle, watching for the moment the shadows start to move. When they do, I go straight to the stop bath — not draining the print first, because during the exponential phase even the seconds it takes to drain can overshoot. That single judgement, made in the dark, against a print that is actively running away from me, determines more about the final image than any other decision in the process.
Everything below is an attempt to make that judgement less arbitrary. The rules of lith printing invert what conventional darkroom experience teaches: more exposure produces lower contrast, longer development produces cooler colours, and the highlights are fixed at the moment of exposure while the shadows are fixed at the moment you snatch. Each variable operates somewhat independently, which gives a control range Tim Rudman described as spanning six or seven equivalent paper grades from a single material — a remarkable claim, and one my own prints bear out.
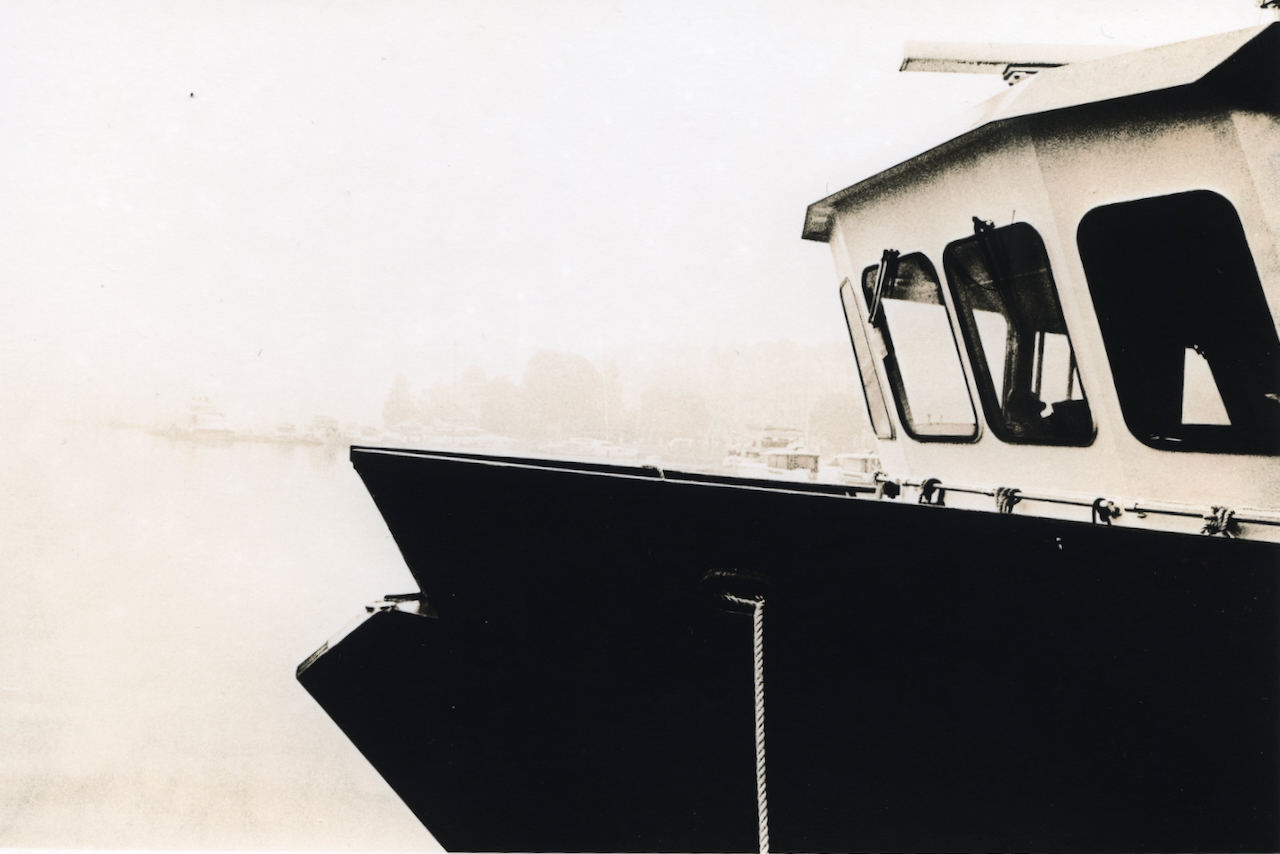
This post examines the practical control variables: how to use exposure to set contrast, how to read and execute the snatch point, how temperature affects everything, and how to manage (or encourage) the characteristic effects—snowballs and peppercorns—that give lith prints their distinctive texture. The previous post covered the underlying chemistry; here we translate that understanding into darkroom practice.
The Two Golden Rules
Almost everything I know about controlling this process I got from Tim Rudman's books rather than from working it out myself, and his two principles are the frame I still print inside. They are worth stating as his rather than as facts of nature — they are a model that has held up, not a law.
Golden Rule One: Image colour and contrast relate to grain size in the paper emulsion, which relates to development stage. Small grains forming early in development appear soft and warm. Large grains forming late in development appear hard and cold.
Golden Rule Two: Highlights are controlled by exposure. Shadows are controlled by development (the snatch point).
The practical consequence is that two mistakes are unrecoverable in opposite directions. I cannot improve weak highlights by leaving the print in longer — they were determined by how much exposure they received, and no amount of development will retrieve them. I cannot control shadow density by adjusting exposure — the shadows are set by when I pull the print. The two variables act on different parts of the tonal scale through different mechanisms, and each will ignore the other's control.
This independence is what gives lith printing its remarkable flexibility. A single paper, a single developer, can produce results ranging from soft and creamy to harsh and graphic, depending entirely on how you balance exposure against snatch timing.
Exposure and Contrast: The Counterintuitive Relationship
In conventional printing, exposure controls overall density. More exposure produces a darker print; less exposure produces a lighter one. Contrast is controlled separately, through paper grade or multigrade filtration.
In lith printing, exposure primarily controls contrast. The relationship runs opposite to intuition: more exposure produces lower contrast; less exposure produces higher contrast.
The mechanism connects to infectious development. When you significantly overexpose (three to four stops beyond normal), highlights and midtones receive substantial exposure. They begin developing earlier and generate semiquinone locally. By the time shadows start their exponential acceleration, highlights have already developed considerable density. You snatch earlier, before infectious development creates extreme separation. The result: more tonal information throughout the scale, softer gradation, a creamier overall appearance.
When you underexpose (one to two stops beyond normal), highlights remain thin. They barely develop before shadows demand attention. You must extend development to achieve proper shadow density, which means the infectious cascade runs longer. The result: pale, delicate highlights against harsh, gritty blacks. Maximum tonal separation. High graphic contrast.
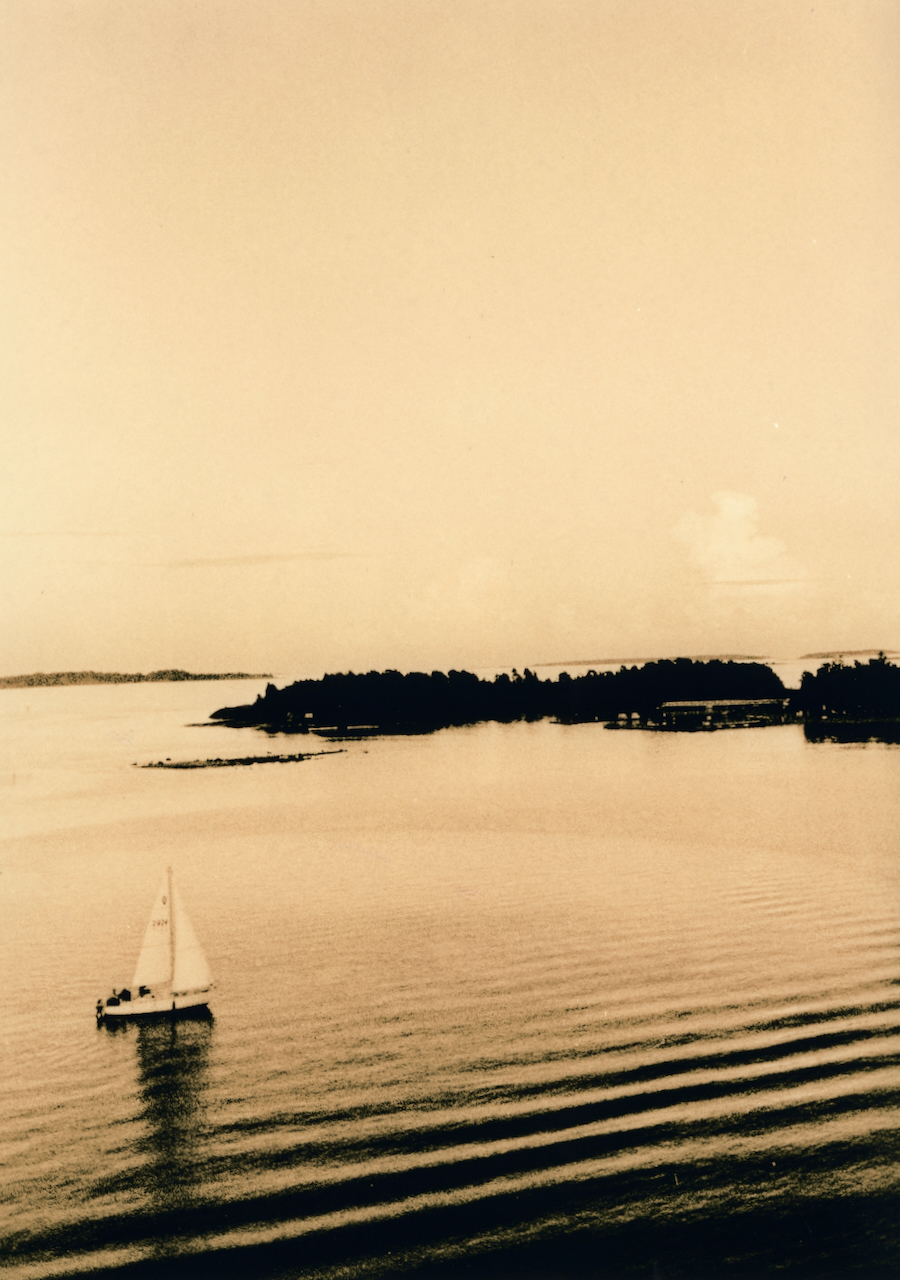
The practical baseline I use: expose approximately two stops beyond what would produce a proper conventional print, then adjust based on negative contrast. Contrasty negatives need more exposure (to lower lith contrast). Flat negatives need less exposure (to increase lith contrast). The exposure/contrast relationship becomes a tool for matching the process to the source material.
The Snatch Point: Reading the Developing Image
The snatch point is the critical moment when you remove the print from developer and transfer it immediately to stop bath. Unlike conventional printing, where you might time development to a standard interval, lith printing demands visual judgment during infectious development. You're watching a process accelerate and deciding when to intervene.
The development timeline unfolds in distinct phases. During the induction period—typically two to five minutes depending on dilution and temperature—almost nothing visible happens. Then faint highlights emerge, ghostly and uncertain. During slow development, midtones appear and the image becomes recognisable. The print looks light, underdeveloped by conventional standards.
Then comes the acceleration phase. Shadows begin darkening noticeably. If you're watching carefully, you can see the pace quicken. Development that was gradual becomes visible. Finally, infectious development dominates. Shadows don't darken—they explode. Density increases exponentially. This is your snatch window.
A rough timing heuristic that many practitioners use: the snatch point often arrives at approximately double the time from when the image first became visible. If highlights emerged at two minutes, expect to snatch somewhere around four minutes. This isn't a rule—too many variables affect actual timing—but it helps calibrate expectations, especially when you're learning to read development pace.
Snatch too early: The print emerges with weak, muddy blacks lacking punch. Tonal separation is minimal. Grain is fine, but shadow density disappoints. The image looks flat.
Snatch too late: Shadows block up, losing detail. Grain becomes excessive, particularly in transition zones. The image looks harsh, graphic—or if severely late, simply black in the lower half of the tonal scale.
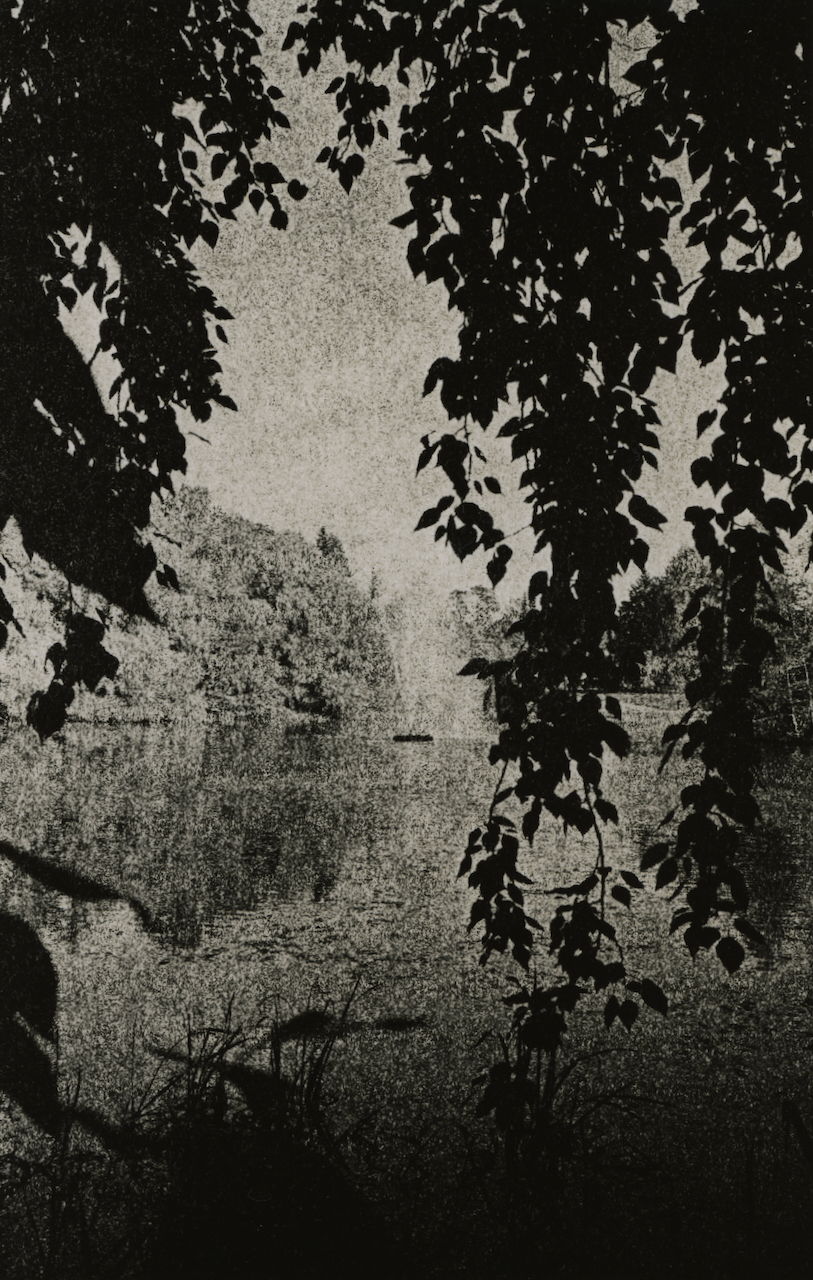
I use a safelight torch to monitor shadow development, holding it at an angle that reveals emerging density. The print needs to keep moving gently in the tray for even development. When the most important shadow area reaches proper density, I go directly to stop bath without draining—even seconds of continued development can overshoot during the exponential phase.
The key shadow area matters. Don't watch the deepest black in the image; watch the shadow that needs detail. A face in shade, texture in dark fabric, architecture in shadow—whatever carries important information in the lower tones. When that area reaches proper density, snatch regardless of what the pure blacks are doing.
Temperature: Accelerator and Modifier
Heat speeds everything in lith printing, but not uniformly. Temperature affects development time, colour, grain structure, and developer exhaustion rate.
At twenty degrees Celsius (sixty-eight Fahrenheit), development times run five to twenty minutes or longer depending on dilution and paper. This is the standard baseline, allowing comfortable working pace and maximum control over the snatch point.
Raising temperature to thirty to forty degrees (eighty-six to one hundred four Fahrenheit) dramatically accelerates development. Times compress to two to six minutes. The snatch window narrows. But heated development also produces more colour—the shorter development time means smaller grain size at the moment of snatching, which translates to warmer tones. Some practitioners deliberately work warm, accepting the reduced control window in exchange for enhanced colour.
Below eighteen degrees, infectious development may fail to engage properly. Times extend dramatically, and the characteristic lith effects diminish. Cold chemistry is not recommended.
Temperature also affects developer longevity. Warm developer exhausts faster—both because it's working harder and because oxidation accelerates with heat. If you're working warm, expect to refresh or replace developer more frequently during a session.
Safety note: with formaldehyde-containing developers (traditional Kodalith-type formulations), heated chemistry produces significant fumes. Use Moersch's formaldehyde-free options (EasyLith, SE5 Master) when working warm, or ensure exceptional ventilation if using traditional developers.
My typical practice: I'll warm the chemistry to around thirty five degrees and work quickly.
A:B Ratio Adjustments
With two-part developers like EasyLith, the ratio of Part A (hydroquinone) to Part B (alkali and restrainers) provides additional fine control.
More A than B (for example, 20ml A to 15ml B): Increases contrast. Produces more colourful highlights. Increases grain and texture in shadows. Development may be slightly faster. Use for flat negatives or when you want maximum lith character.
Equal A:B (standard): Balanced results. The recommended starting point for learning paper and chemistry behaviour.
More B than A (for example, 15ml A to 20ml B): Reduces contrast. Produces less deep blacks, softer tonal transitions. Reduces colour intensity. Finer grain. Use for contrasty negatives or when you want smoother results.
The Moersch SE5 Master kit extends this with dedicated additives. Lith C (sodium sulfite) suppresses grain and peppering—useful when you want smooth tones from a paper that tends towards texture. Lith D (potassium bromide) slows development and increases colour—useful when colour matters more than speed. Lith E increases grain at the expense of colour—useful for deliberately gritty effects.
I should be straightforward about this section: it is Moersch's guidance and Rudman's, not mine. I work at equal A:B and I have never made a print where I changed the ratio to shift colour. Everything above is reported rather than tested, and I am including it because it is the documented behaviour of the developer, not because I can vouch for it.
That matters more than it might sound, because the received wisdom is not entirely self-consistent — more B than A is described as reducing contrast and softening the print, yet it also turns up in advice for cooler, more graphic results. Those pull in opposite directions. I do not know which effect dominates in practice, and I will not until I run the comparison properly: one negative, one session, three ratios.
Snowballs: The Unwanted Effect
“Snowballs” (or snowflakes) are circular spots where the image fails to develop—round, measles-like defects most visible in highlight areas and clear skies. They result from uneven developer penetration, often caused by hardened emulsion or exhausted chemistry. A clear sky becomes spotted with pale circles. A face develops patchy white marks.
Rather than describe it, here is the same negative twice — a weir in Tampere, printed in the same session on the same paper.
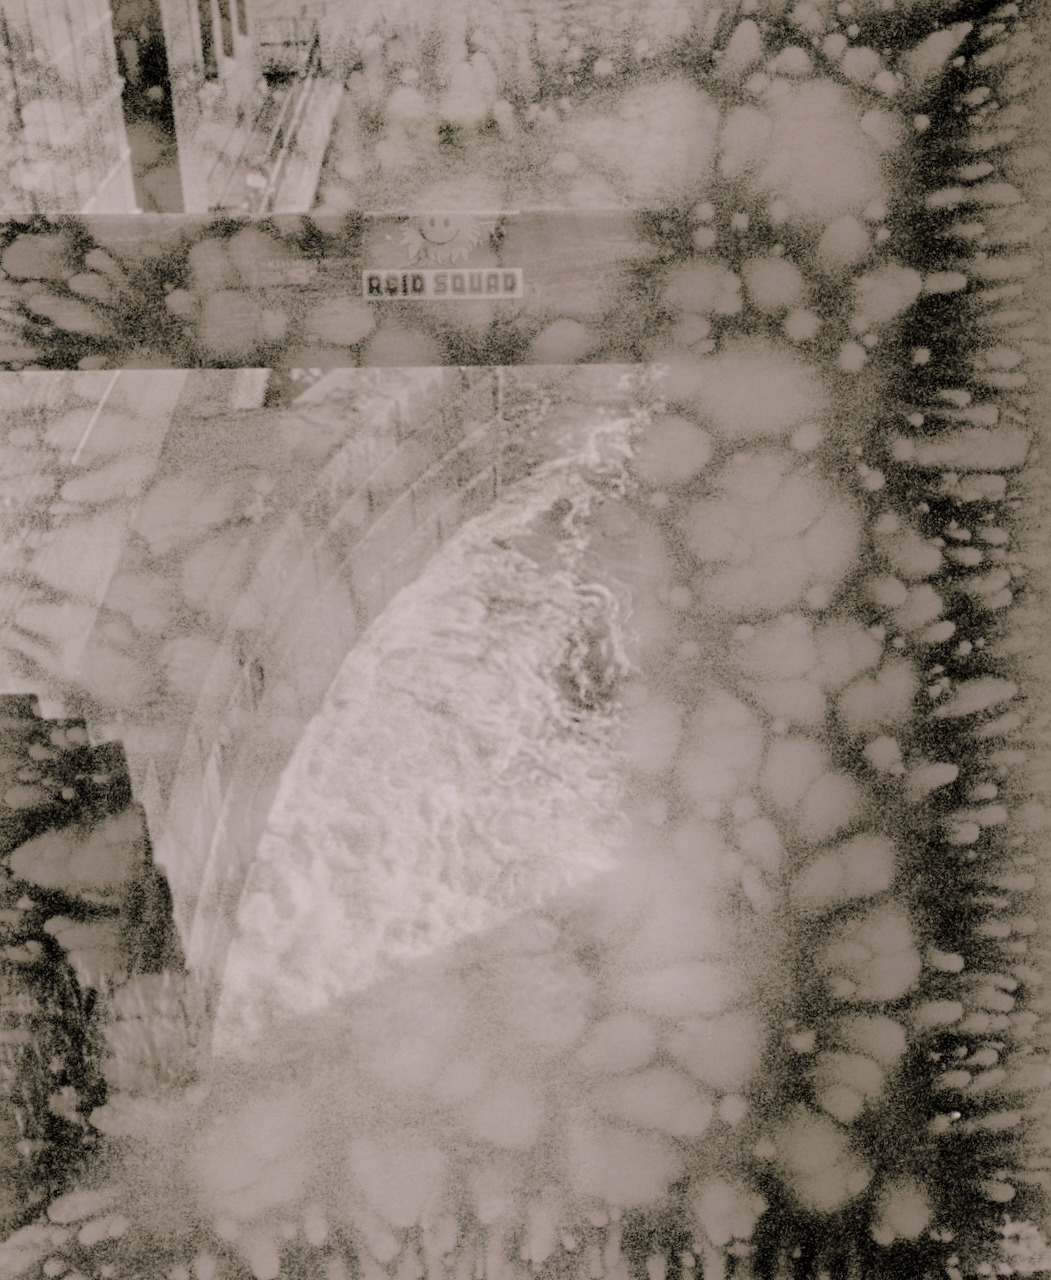
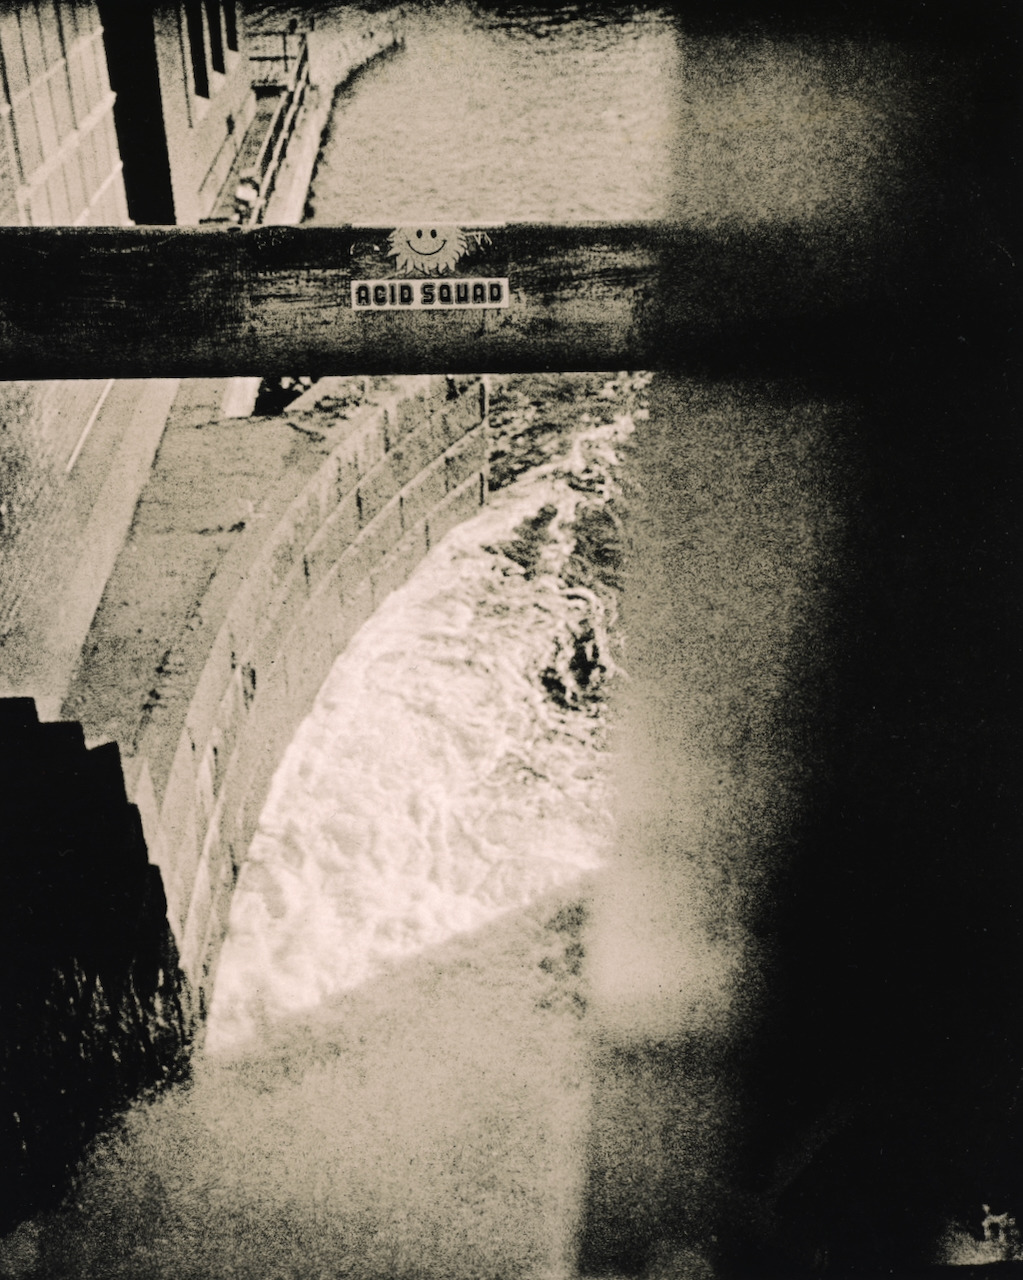
That first print is not a marginal case or a subtle degradation.
Foma papers from certain production batches have been particularly prone to snowballing. The issue relates to emulsion hardness—developer can't penetrate evenly, leaving undeveloped islands. Current Fomatone batches (0796 onward) work better, but the problem hasn't entirely disappeared.
Prevention methods, ranked by effectiveness:
Hydrogen peroxide pre-soak (three percent solution, thirty to ninety seconds): Borrowed from mordançage practice, this softens the emulsion and virtually eliminates snowballs. Don't soak too long—extended peroxide contact can fog the paper. I use this routinely with FomaTone 132.
Warm water pre-soak (ten minutes at approximately thirty-eight degrees): Moderately effective. Softens emulsion without chemical intervention.
Stronger developer concentration: Reducing dilution from 1:30 to 1:20 often eliminates snowballs simply by increasing developer activity. Some practitioners find this sufficient. I often work at 1:19 for this reason.
Fresher developer: Snowballs become more common as developer exhausts. Adding fresh chemistry mid-session can resolve emerging problems.
EasyLith FT Special: Moersch developed this variant specifically for FomaTone, containing development retarders that help prevent snowballing. Worth considering if standard EasyLith produces consistent problems with your paper batch.
If snowballs appear despite prevention efforts, the print is essentially ruined for that attempt. Snowballs don't fill in with extended development—they remain as permanent undeveloped areas. Start fresh with a new sheet after adjusting your prevention strategy.
Although “ruined” is doing some work in that sentence, and I want to qualify it. At low intensity the same defect stops reading as damage and starts reading as weather.
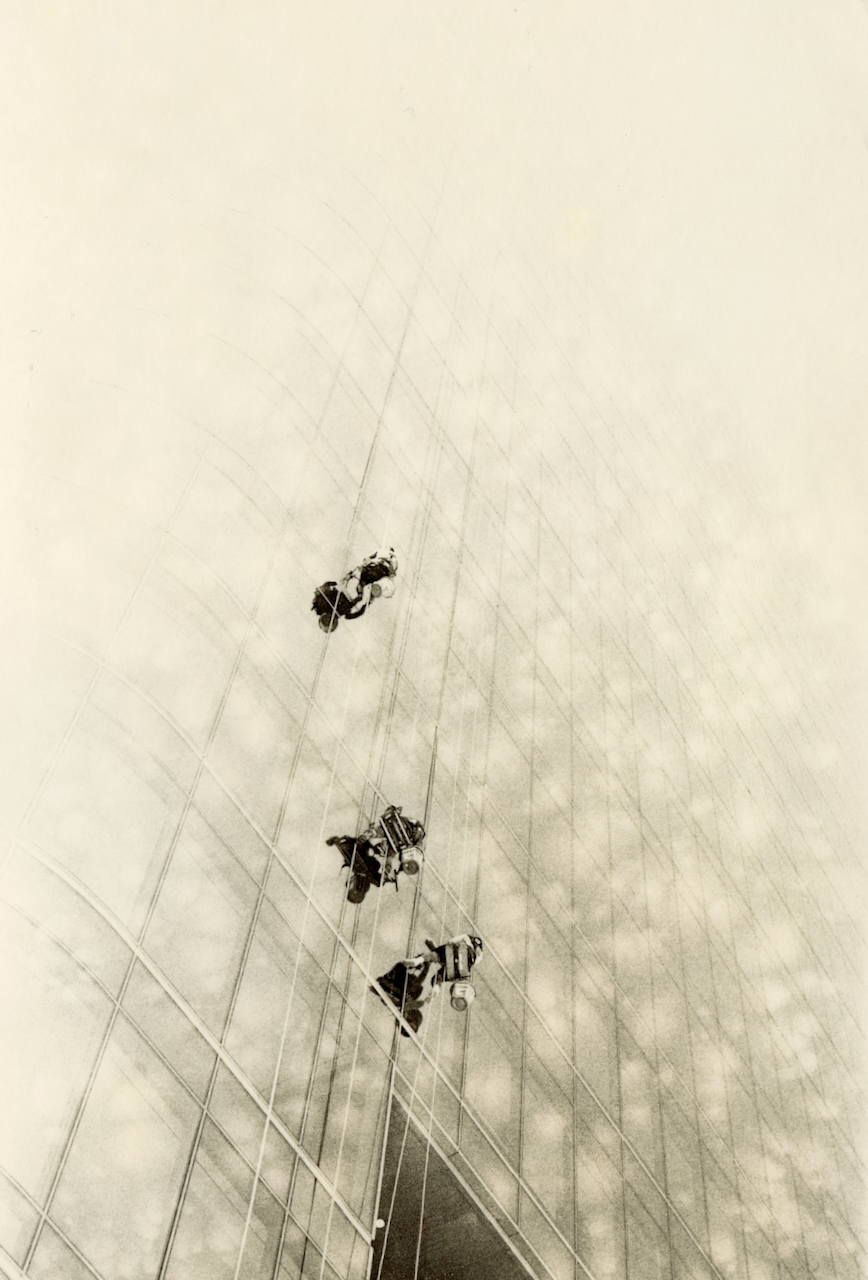
Which is the thing I find hardest to write rules about. The difference between the Tampere print and this one is a matter of degree in a defect I do not fully control, and my response to it is not consistent — I threw one away and kept the other. The prevention list is honest advice for getting a predictable print. It is not advice for getting an interesting one.
Peppercorns: The Characteristic Grain
“Peppercorns” (or pepper grain) describes the visible textural structure unique to lith printing—small black dots sprinkled across the image, particularly in transition zones between shadows and midtones. Unlike film grain, which you're reproducing from the negative, this is emulsion grain created by the development process itself.
The effect results from uncontrolled infectious development spreading to unexposed areas. Where semiquinone concentration is high (near developing shadows), some crystals that received no camera exposure reduce anyway, creating random developed spots. The result is visible texture that can range from subtle stippling to aggressive grit.
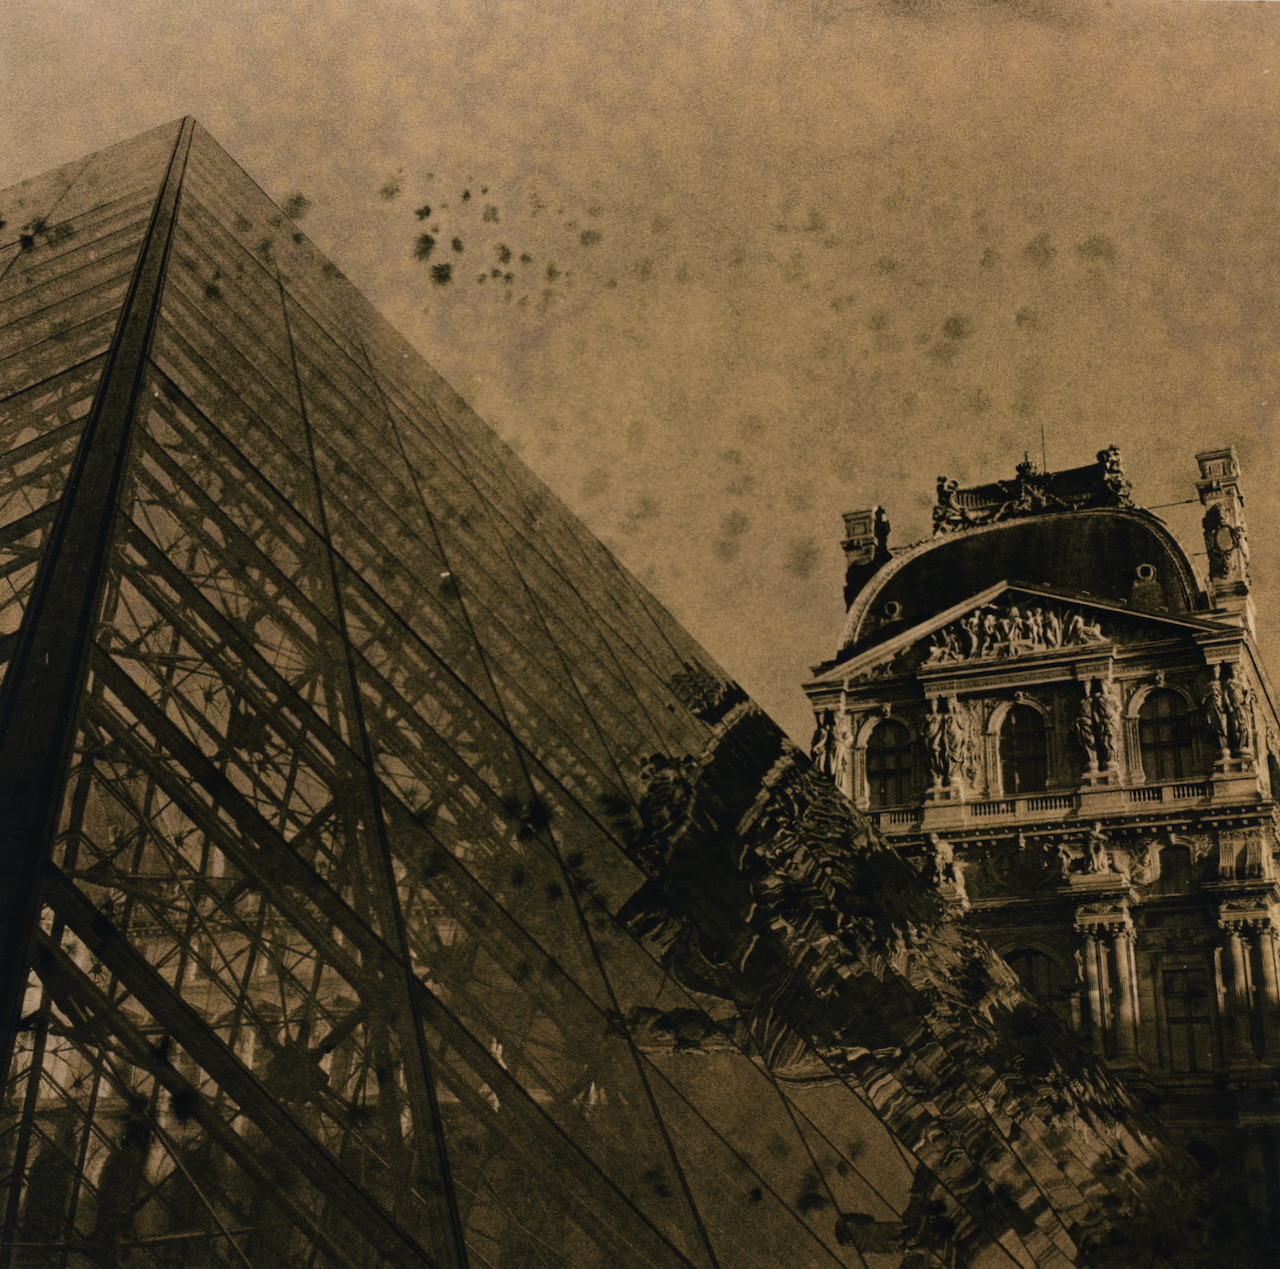
Whether peppercorns are desirable depends entirely on the image. For portraits, excessive pepper can be distracting. For industrial subjects, urban scenes, or deliberately rough aesthetics, pepper adds character. The effect is controllable within limits.
To reduce peppering: Add sodium sulfite (Moersch Lith C) to suppress random development. Use slight excess of B solution. Use stronger (less dilute) developer. Use fresh developer. Lower temperature. Choose warm-tone papers like FomaTone 132.
To encourage peppering: Use highly diluted, exhausted developer. Increase temperature. Choose high-bromide papers like FomaBrom 152. Use excess A solution. Extend development in well-used developer.
FomaBrom 152, with its high bromide silver content, produces notably grittier results than FomaTone 132. This isn't a flaw—it's a characteristic. If you want smooth creamy prints, use FomaTone. If you want gritty graphic prints, use FomaBrom. The papers offer different aesthetics from the same chemistry.
Colour Control: Working the Palette
Lith prints produce warm colours—pinks, creams, sepias, olives—without toning. The colour emerges from the physics of light scattering from different grain sizes. Small silver particles (formed early in development) appear warm brown, olive, or pink. Large particles (formed late in development) appear cold black or blue-black. Because highlights develop slowly while shadows develop rapidly, a single print contains both colour temperatures simultaneously.
Several factors shift the palette:
Development time: Longer development allows more colour differentiation. Optimal colour typically requires six to twelve minutes; under four minutes barely qualifies as lith in colour terms. With FomaTone, I find five minutes produces yellow, seven to eight minutes produces rich colour, and ten-plus minutes produces reddish tones.
Developer age: Fresh developer produces faster, less colourful results. Used developer (Old Brown) produces richer colours and more pronounced lith characteristics. Always inoculate fresh chemistry with Old Brown.
Temperature: Warmer development with early snatching produces more colour because grains don't have time to grow large. Cooler development with extended times produces cooler tones.
Paper choice: Each paper has a characteristic palette. FomaTone 132 produces reddish-yellow highlights with green-black shadows—very colourful even with short development. FomaBrom 152 can achieve yellow-red but tends towards cold tones overall.
A:B ratio: Reported to shift colour — more A than B increasing it, more B than A reducing it. Untested by me; see the caveat above.
For maximum colour: overexpose significantly, use dilute developer with Old Brown, work at moderate temperature, and snatch when shadows first reach proper density. For cooler, more graphic results: underexpose, use fresher developer at higher concentration, and extend development beyond the first adequate shadow density.
High Contrast Versus Low Contrast: Two Approaches
Understanding the exposure/snatch relationship as a unified framework helps you approach any negative deliberately rather than randomly. The two extremes define the range of what's possible.
The exposure/snatch relationship gives you two fundamentally different approaches to lith printing.
High contrast printing (underexposure, extended development): Pale, delicate highlights. Dense, blocked shadows. Maximum tonal separation. Graphic, dramatic appearance. Cooler overall colour. More grain and pepper. Works well for architectural subjects, industrial scenes, dramatic portraits, and any image where you want bold separation.
Low contrast printing (overexposure, early snatch): Rich, detailed highlights. Softer shadows with retained detail. Smooth tonal transitions. Creamy, pictorialist appearance. Warmer overall colour. Finer grain. Works well for portraits, landscapes, and any image where you want tonal information throughout the scale.
This is the counterintuitive claim from earlier in the post — that more exposure gives less contrast — and it is easier to believe from two prints than from a paragraph. Same negative, a valley outside Trento, printed both ways.
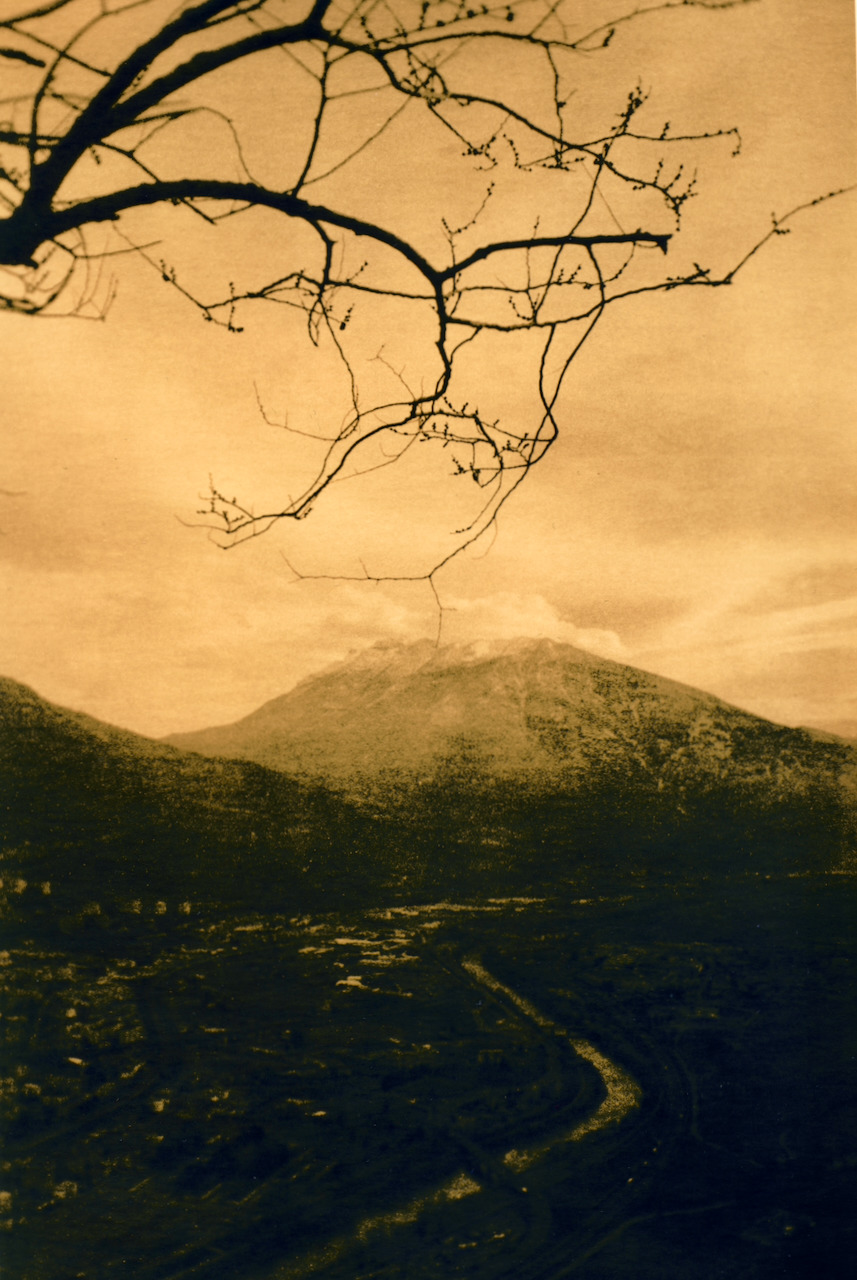
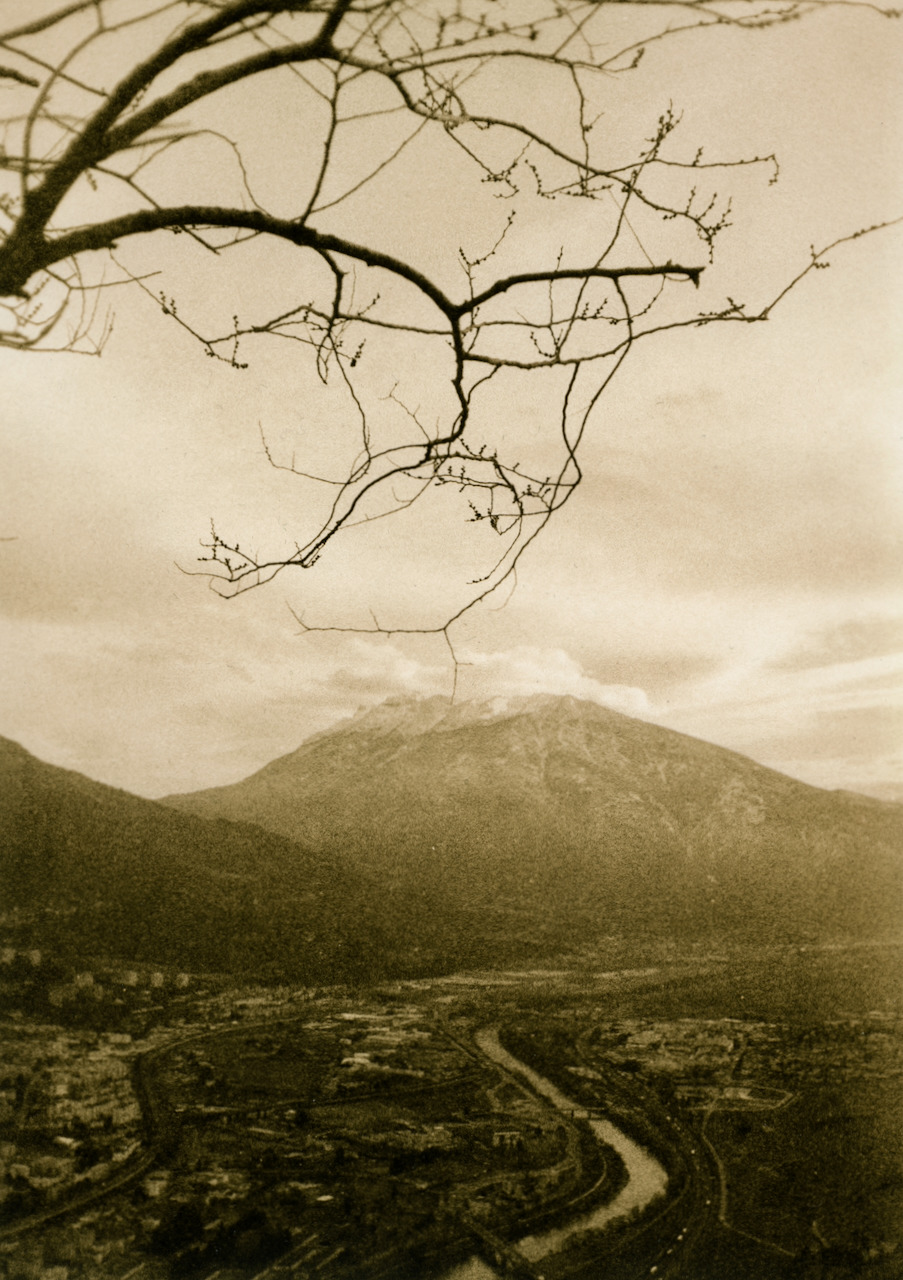
Neither is the correct one. The first is a stronger picture and the second is a more complete one, and choosing between them is the actual work.
Most of my work falls somewhere between these extremes—I aim for neither maximum drama nor maximum smoothness, but a balanced lith character that preserves detail while still showing the process's distinctive look. But understanding the extremes helps you navigate towards your intended result.
A useful workflow: start with your two-stop-over baseline exposure. Make a print. Evaluate whether you want more or less contrast. Adjust exposure by a stop in the appropriate direction. Make another print. After a few iterations, you'll develop intuition for where different negatives want to sit on the exposure scale.
Putting It Together: A Control Framework
What follows is the cheat sheet I keep in my head, written out. Treat it as a set of tendencies rather than settings — every line of it is a direction to push in, not a value to dial.
For warmer, more colourful results: Increase overexposure. Increase dilution. Add Old Brown. Lower temperature. Add restrainers. Use more A than B. Snatch earlier relative to shadow development.
For cooler, more graphic results: Decrease overexposure. Use stronger concentration. Omit Old Brown. Work at room temperature or cooler. Use more B than A. Snatch later, allowing infectious development to run longer.
For smoother, less grainy results: Use warm-tone paper (FomaTone 132). Add sodium sulfite. Use fresher developer. Work at moderate temperature. Snatch before excessive shadow development.
For grittier, more textured results: Use cold-tone paper (FomaBrom 152). Use exhausted developer. Work warm. Extend development. Use more A than B.
The point is that none of these is a single adjustment. Each one moves several properties of the print at once, which is why the framework is a set of tendencies rather than a recipe, and why the only way to learn it is to spend paper.
What I Still Cannot Predict
Everything above describes a process I can steer. It does not describe one I understand, and I want to be honest about where the edge of that is.
I cannot reliably predict how a given box of paper will behave. Batch variation in the remaining lith papers is real and widely reported, and I have had sheets from different boxes of the same stock want noticeably different snatch points. I do not know how much of that is manufacturing and how much is age, storage, or my own inconsistency in mixing.
I also cannot account for one result that ought to be adjacent to all of this. When I later tried silver mirror toning on lith prints, Retrobrom 152 took it well and FomaTone 132 — the paper I use for most of my lith work, and the one I recommend below — showed no response at all. Same bath, same session. I have four candidate explanations and no way to choose between them. Which is a useful reminder that knowing how to control a material is not the same as knowing what it is.
In the final post of this series I document current materials — which papers still lith, what chemistry to use, and my working process from exposure through archiving.
References
Primary Sources
Rudman, Tim. The Master Photographer's Lith Printing Course. Argentum, 1998. [Source for the “Golden Rules” framework and contrast control principles.]
Moersch, Wolfgang. “Lithprinting Guide (Lessons 1-6).” Moersch Photochemie, revised January 2023. https://www.moersch-photochemie.de/wp-content/uploads/2023/03/Lith-Anleitung-Lessons-1-6-ENGLISH.pdf [Comprehensive technical guidance including A:B ratio adjustments and temperature effects.]
Online Guides
EMULSIVE. “A Practical Guide to Lith Printing.” https://emulsive.org/articles/darkroom/darkroom-printing/a-practical-guide-to-lith-printing [Accessible walkthrough of exposure and snatch point techniques.]
AlternativePhotography.com. “The Lithprint Process.” https://www.alternativephotography.com/the-lithprint-process/ [Practical overview including snowball prevention.]
Lyons, Gavin. “Lith Printing: A Complete Guide.” Gavin Lyons Photography. [Contemporary practitioner documentation.]
Technical Data
Moersch Photochemie. “EasyLith Technical Data Sheet.” https://www.moersch-photochemie.de/ [Working dilutions and ratio guidance.]
Fotospeed. “LD20 Lith Developer Instructions.” https://www.digitaltruth.com/products/fotospeed_tech/Fotospeed_LD20_Lith_Instr.pdf [Alternative chemistry reference.]
Community Resources
Photrio.com Alternative Processes Forum. https://www.photrio.com/forum/forums/alternative-processes.67/ [Ongoing discussions of paper batch variations and troubleshooting.]
Lith Printing Group (Facebook). [Active community for print sharing and technical questions.]
Large Format Photography Forum. “Current Lith Paper Availability.” https://www.largeformatphotography.info/forum/archive/index.php/t-133851.html [Community tracking of available materials.]